Quick Start
Getting Started
This quick guide will help you getting started with stream nexum. Please refer to the other sections of the documentation for more detailed information.
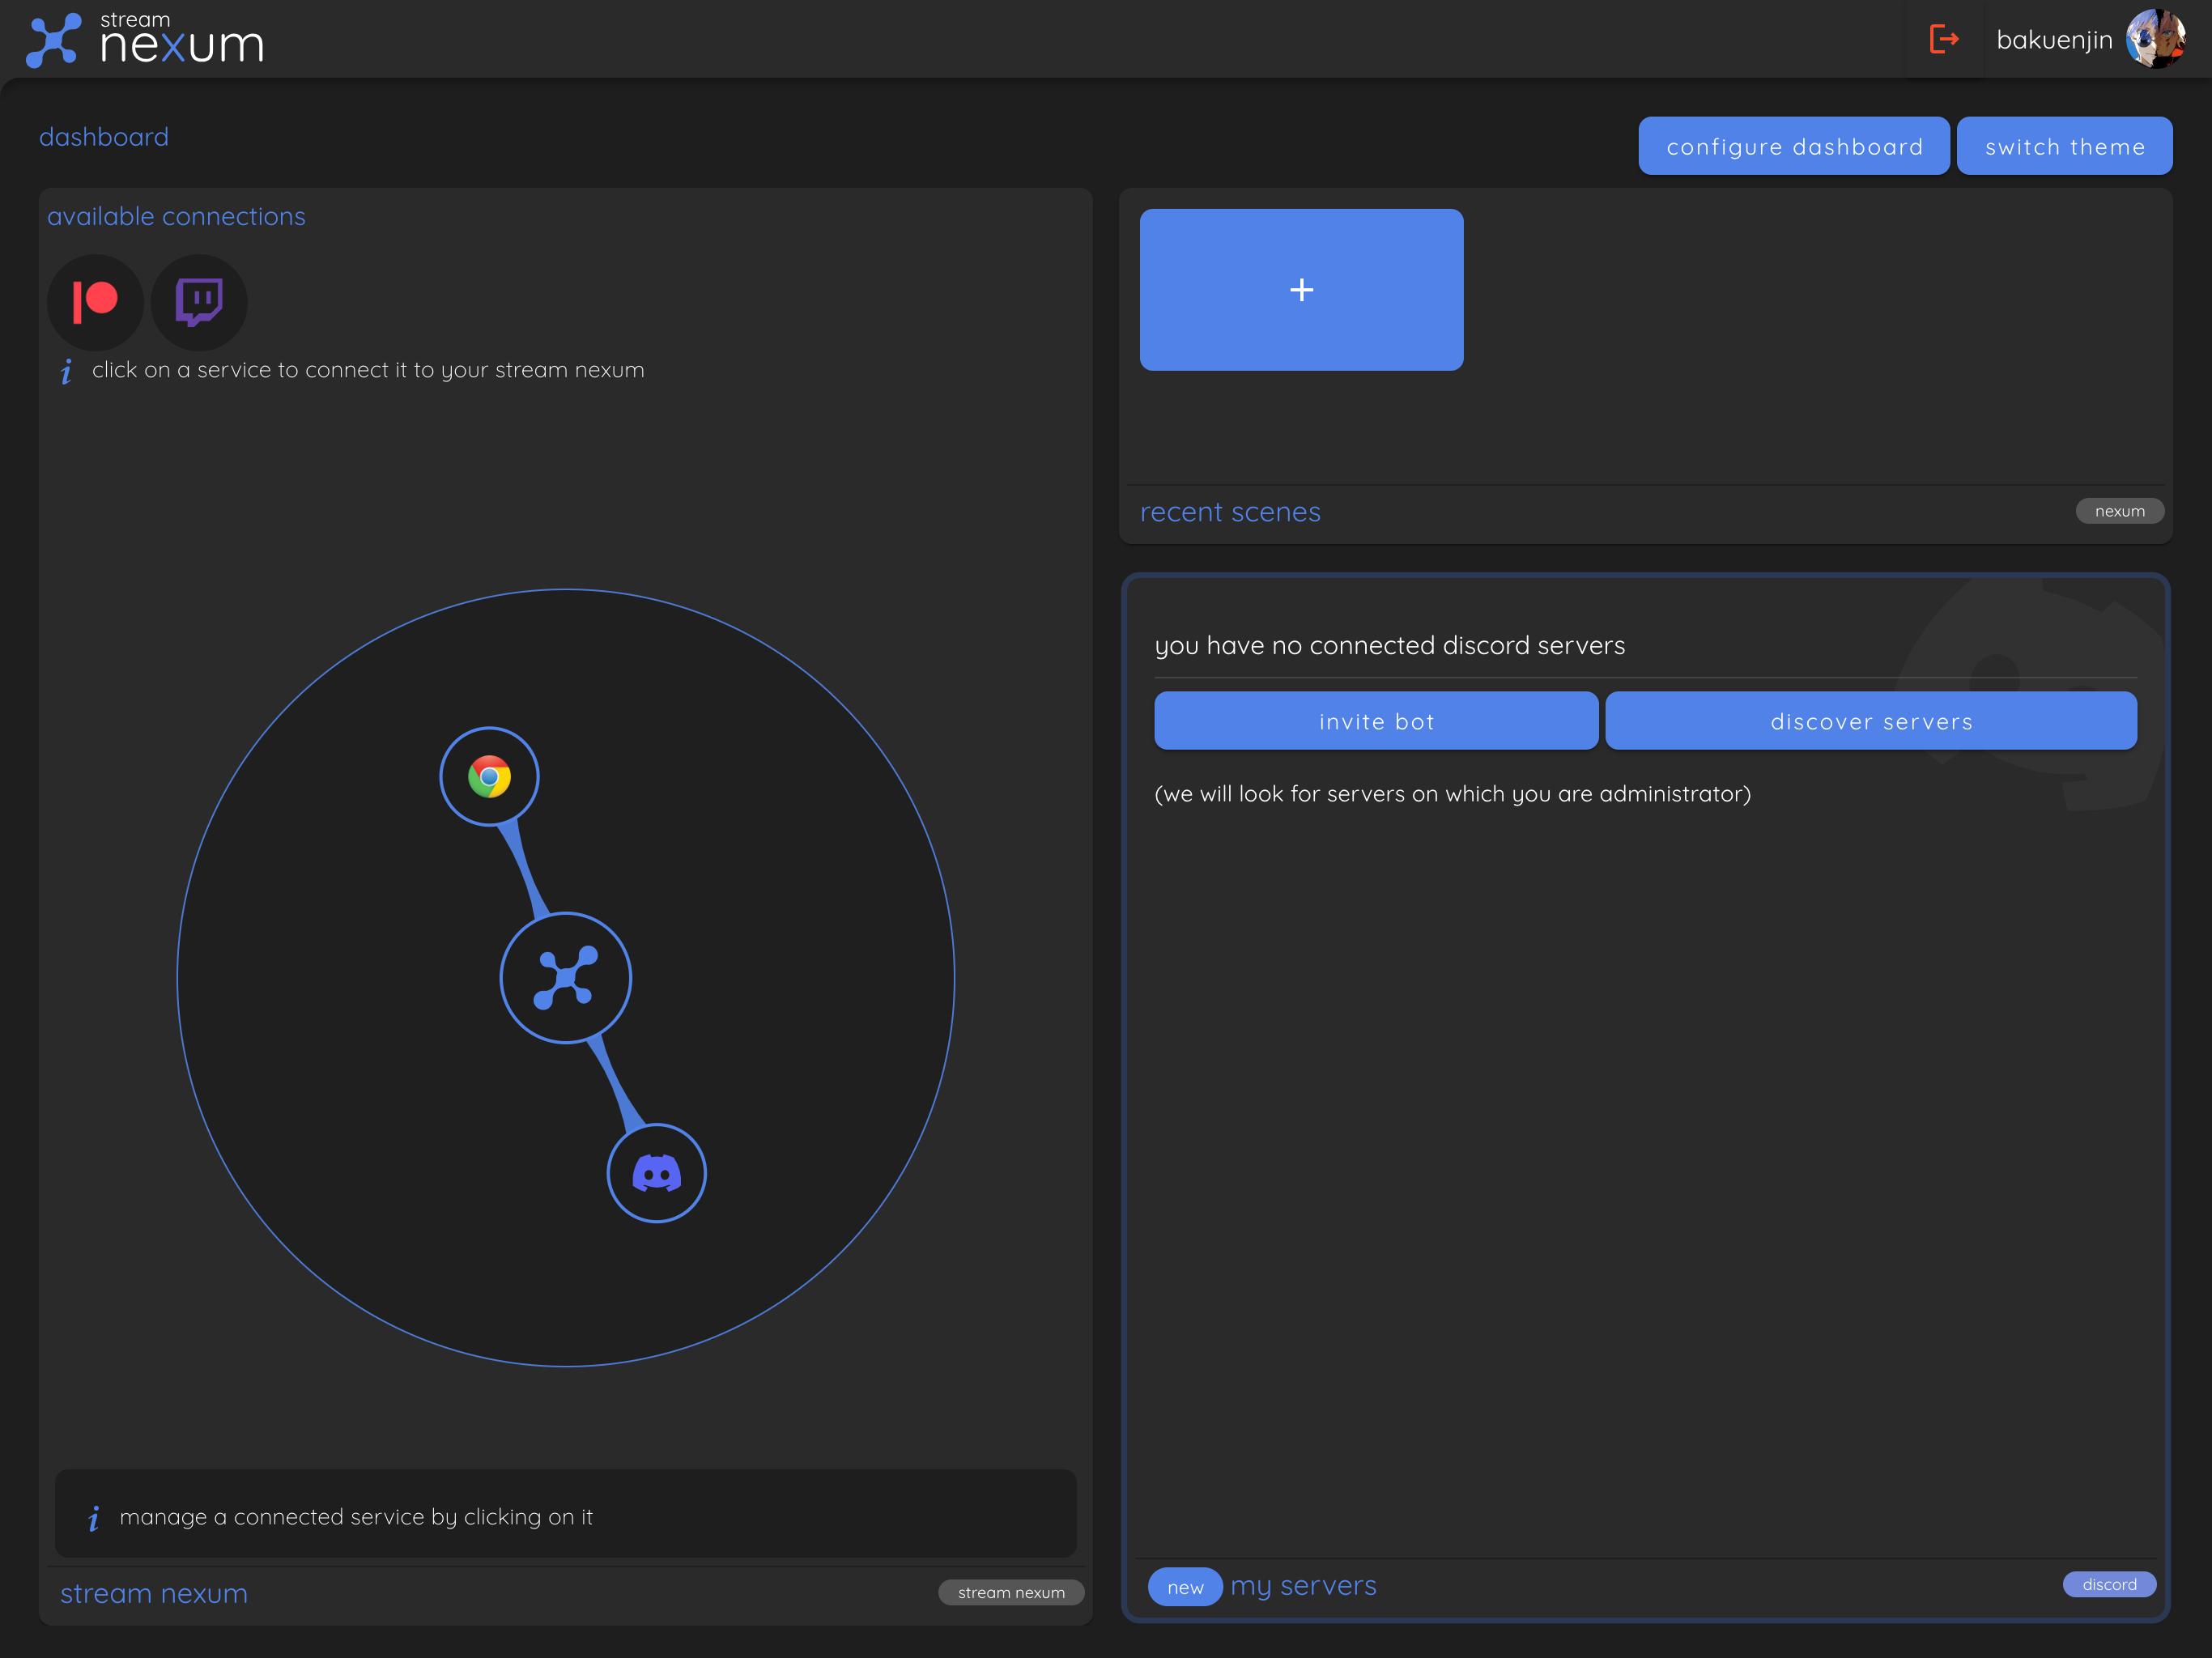
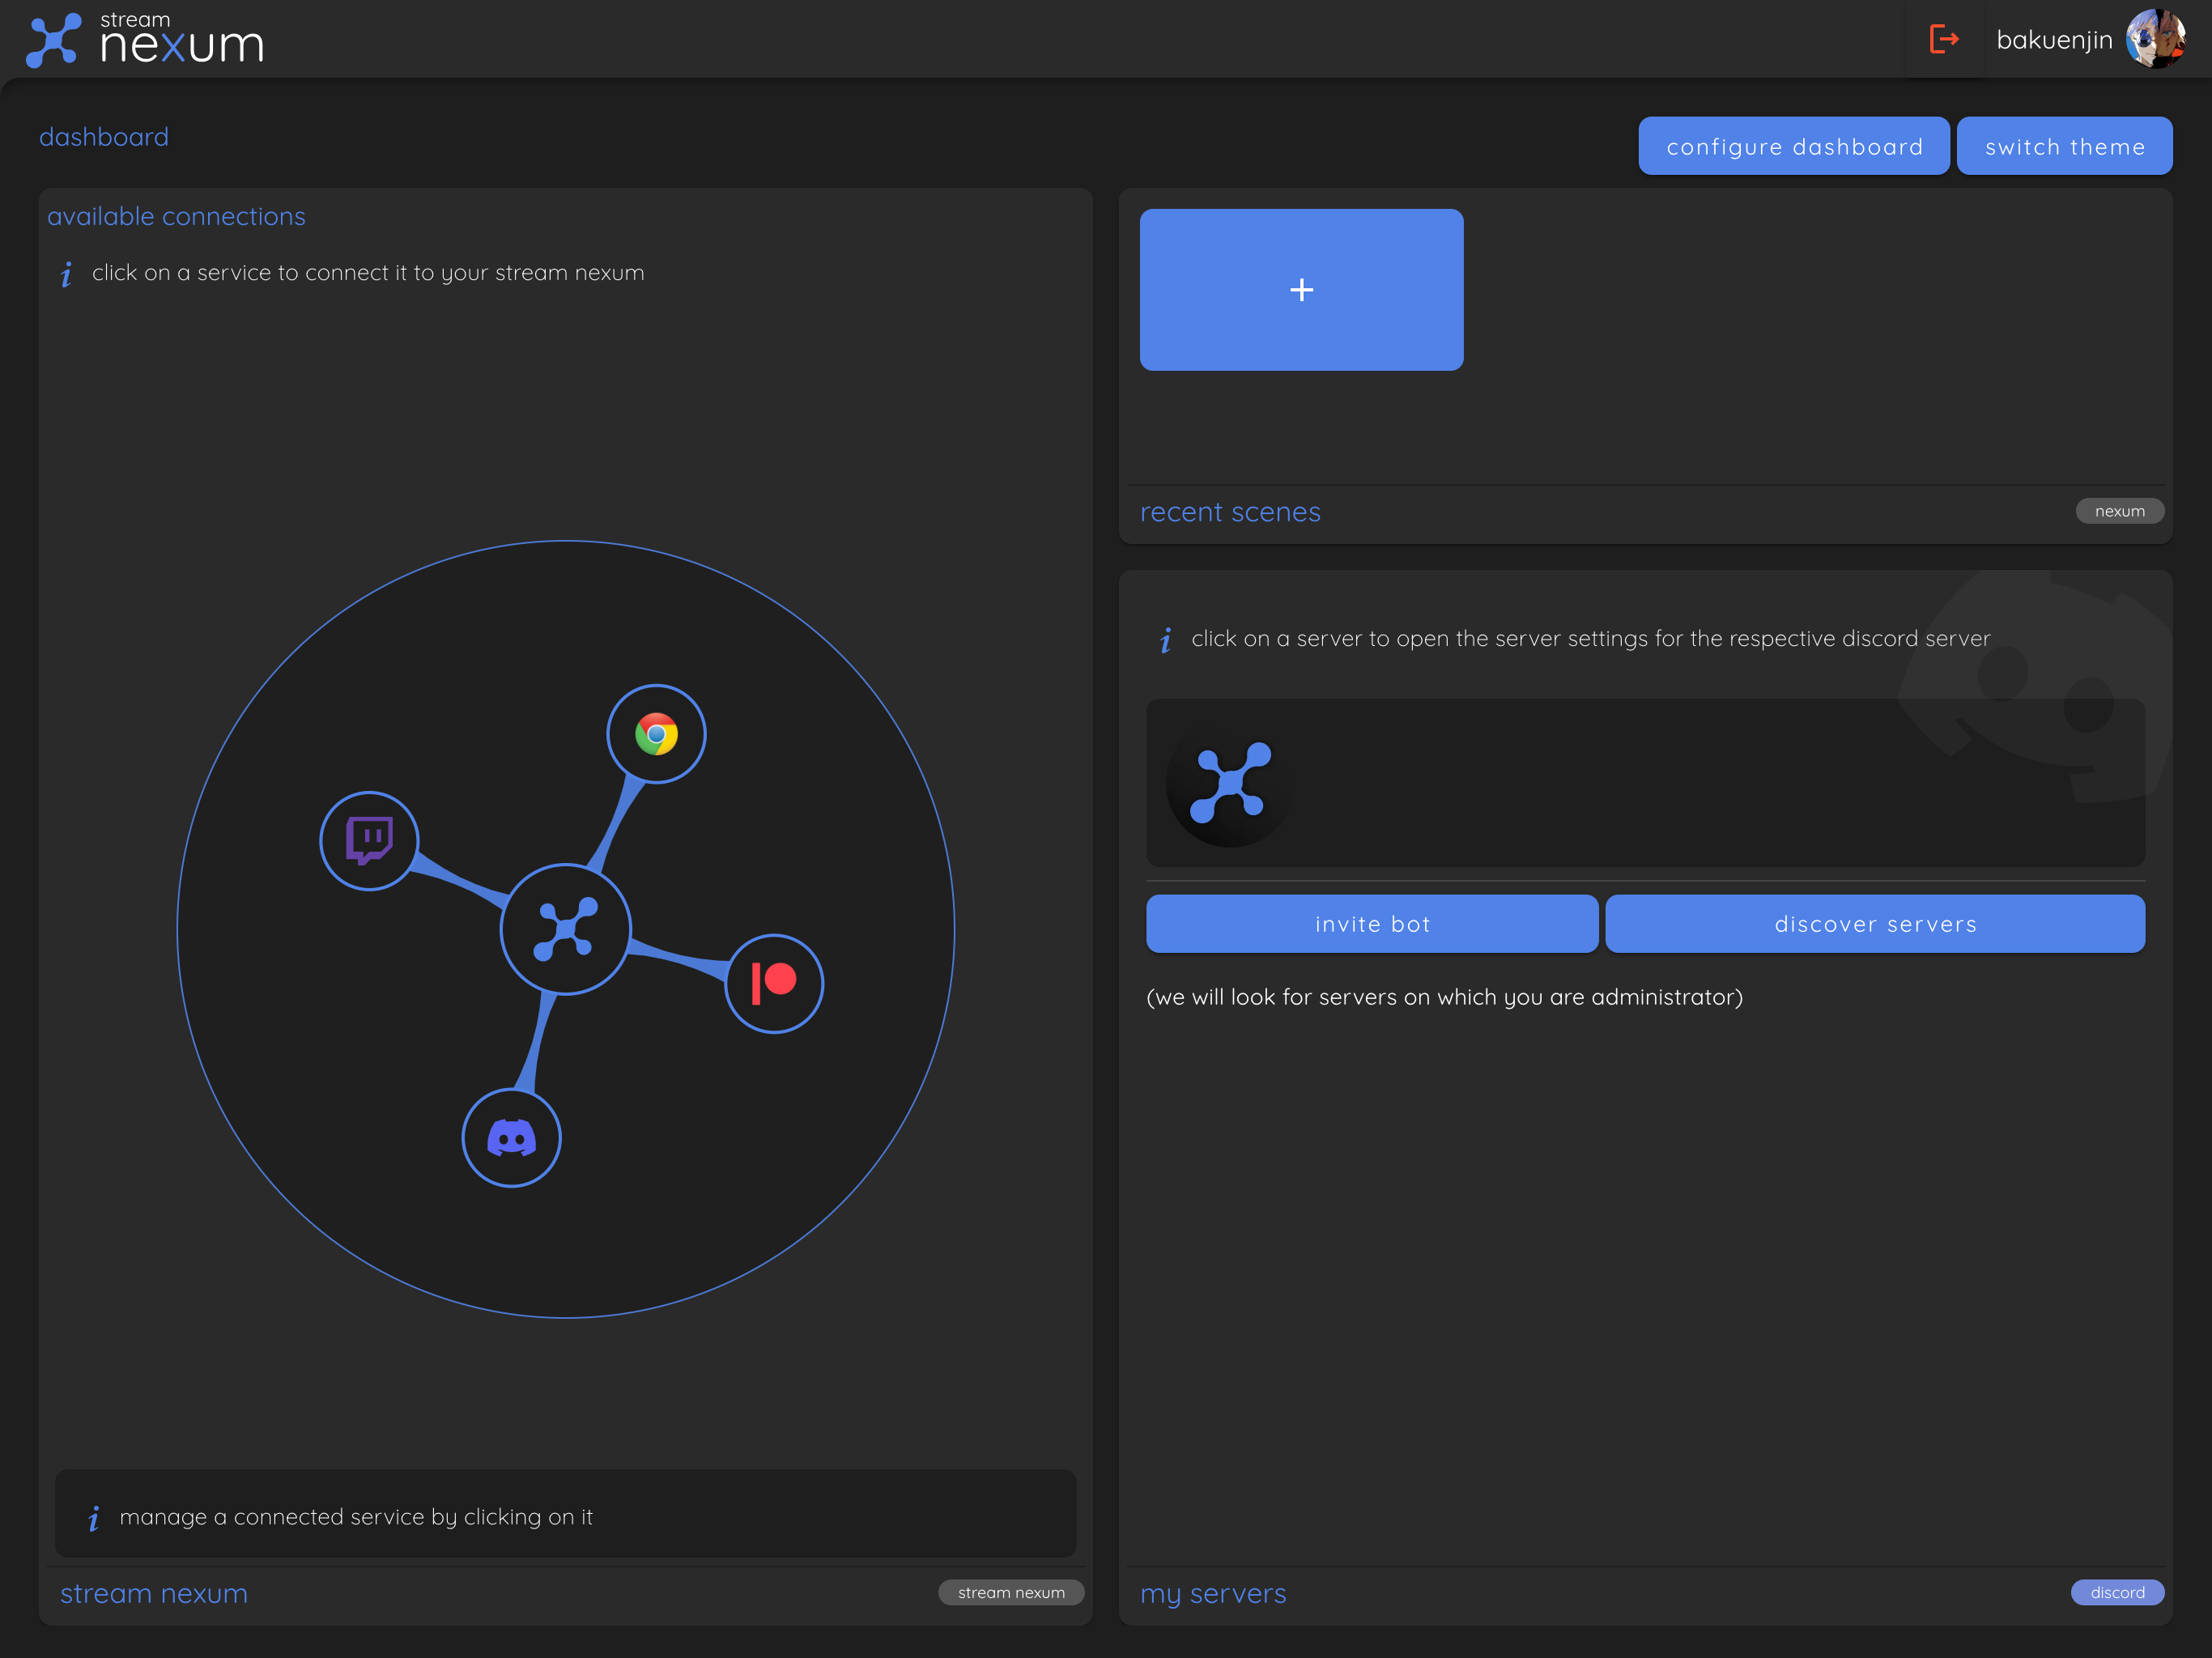
After logging into your stream nexum account, it will take you directly to your dashboard, which will look very similar to this:
The heart of stream nexum is its connections to other platforms like Twitch or Discord, represented by the "stream nexum" tile. For now it only has a single connection: the connection to your chrome browser itself. This connection is referencing our stream nexum Chrome plugin, that enables you to use our powerful "Live Web Content" feature. Click on the Google Chrome bubble and then on the "add chrome plugin" button at the bottom of the tile to add it to your browser, if you haven't already.
Now, let's add some connections to our supported platforms!
Discord Connection
If you have a Discord account, click on the Discord bubble at the top of the "stream nexum" tile to connect your Discord account to stream nexum. You will be redirected to Discord to authorise stream nexum to access your account. Upon successful authorisation, you will be redirected back to stream nexum.
Now that we have connected our Discord account, a new tile was added to our dashboard: the "my servers" tile. This tile can be used to add or remove your Discord servers as well as configure the available stream nexum features for each server.
So first, let's add the stream nexum bot to your Discord servers. To do this, click on the "invite bot" button at the top of the "my servers" tile and follow the instructions provided by Discord.
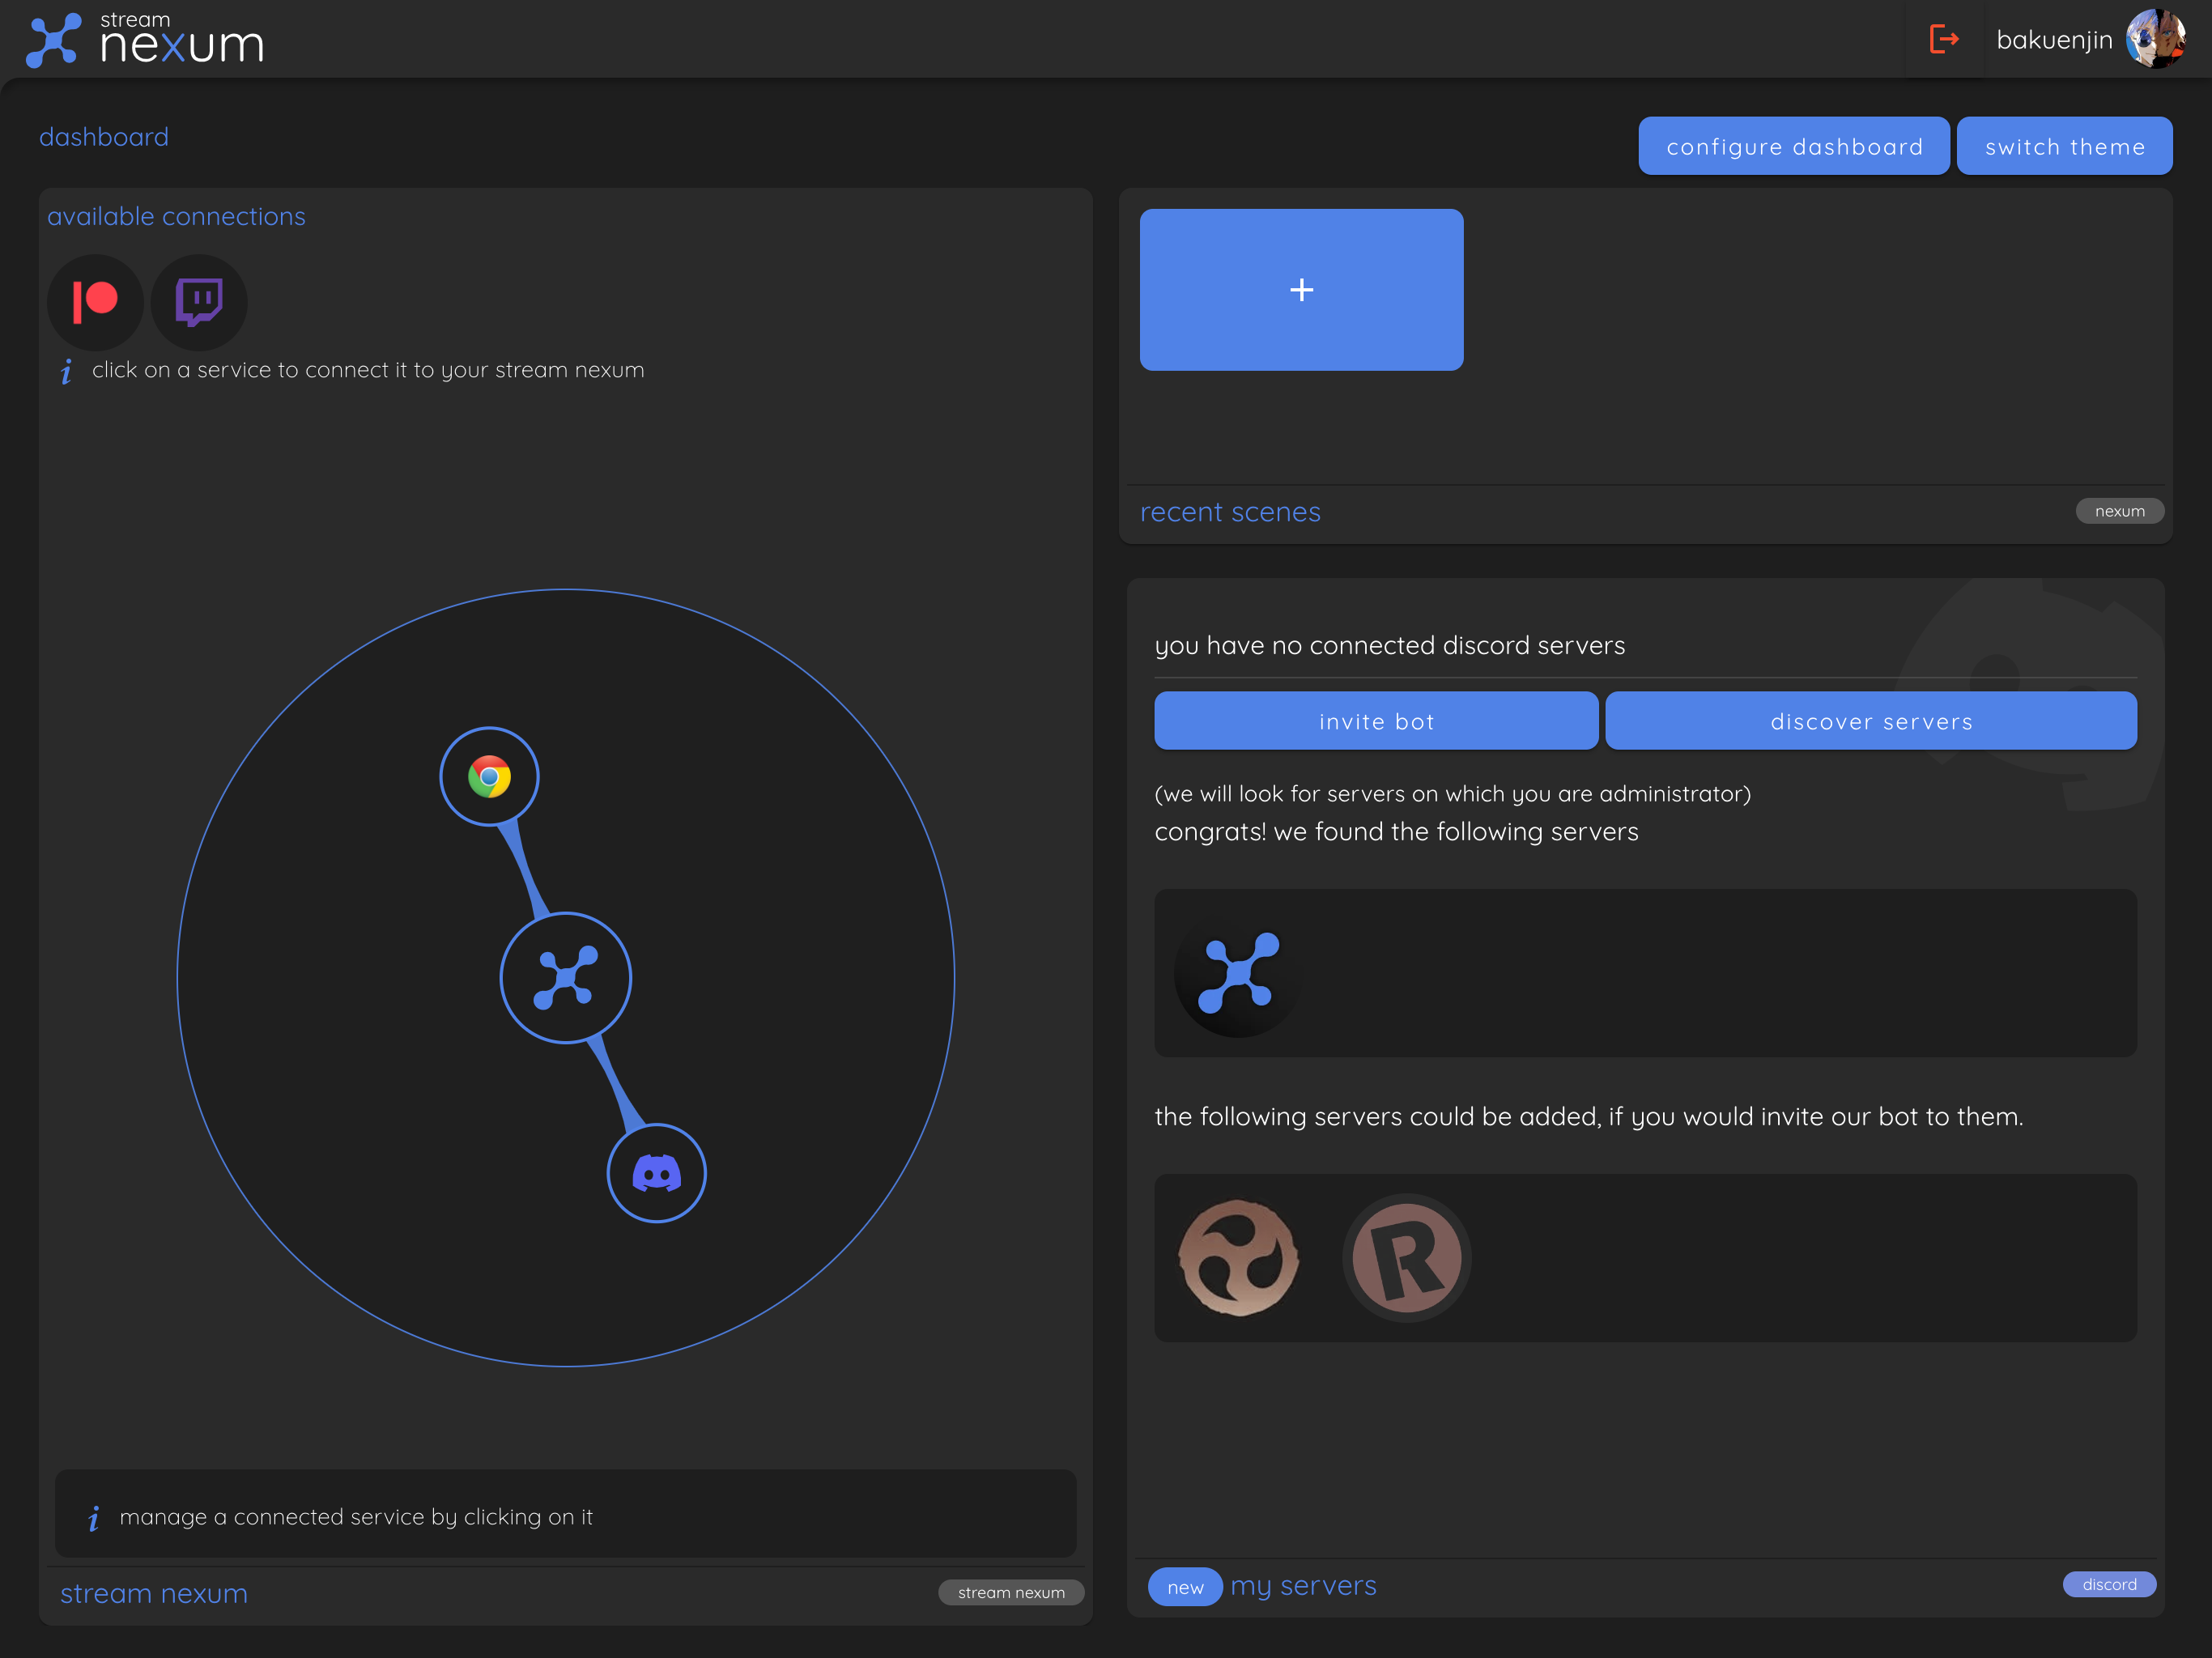
Once the bot has been added to your Discord servers, you can go back to the "my servers" tile and click on the "discover servers" button. This will search all your Discord servers for servers where you are at least an admin and have added the stream nexum discord bot. Simply click on the server icons to connect them to your account.
Twitch Connection
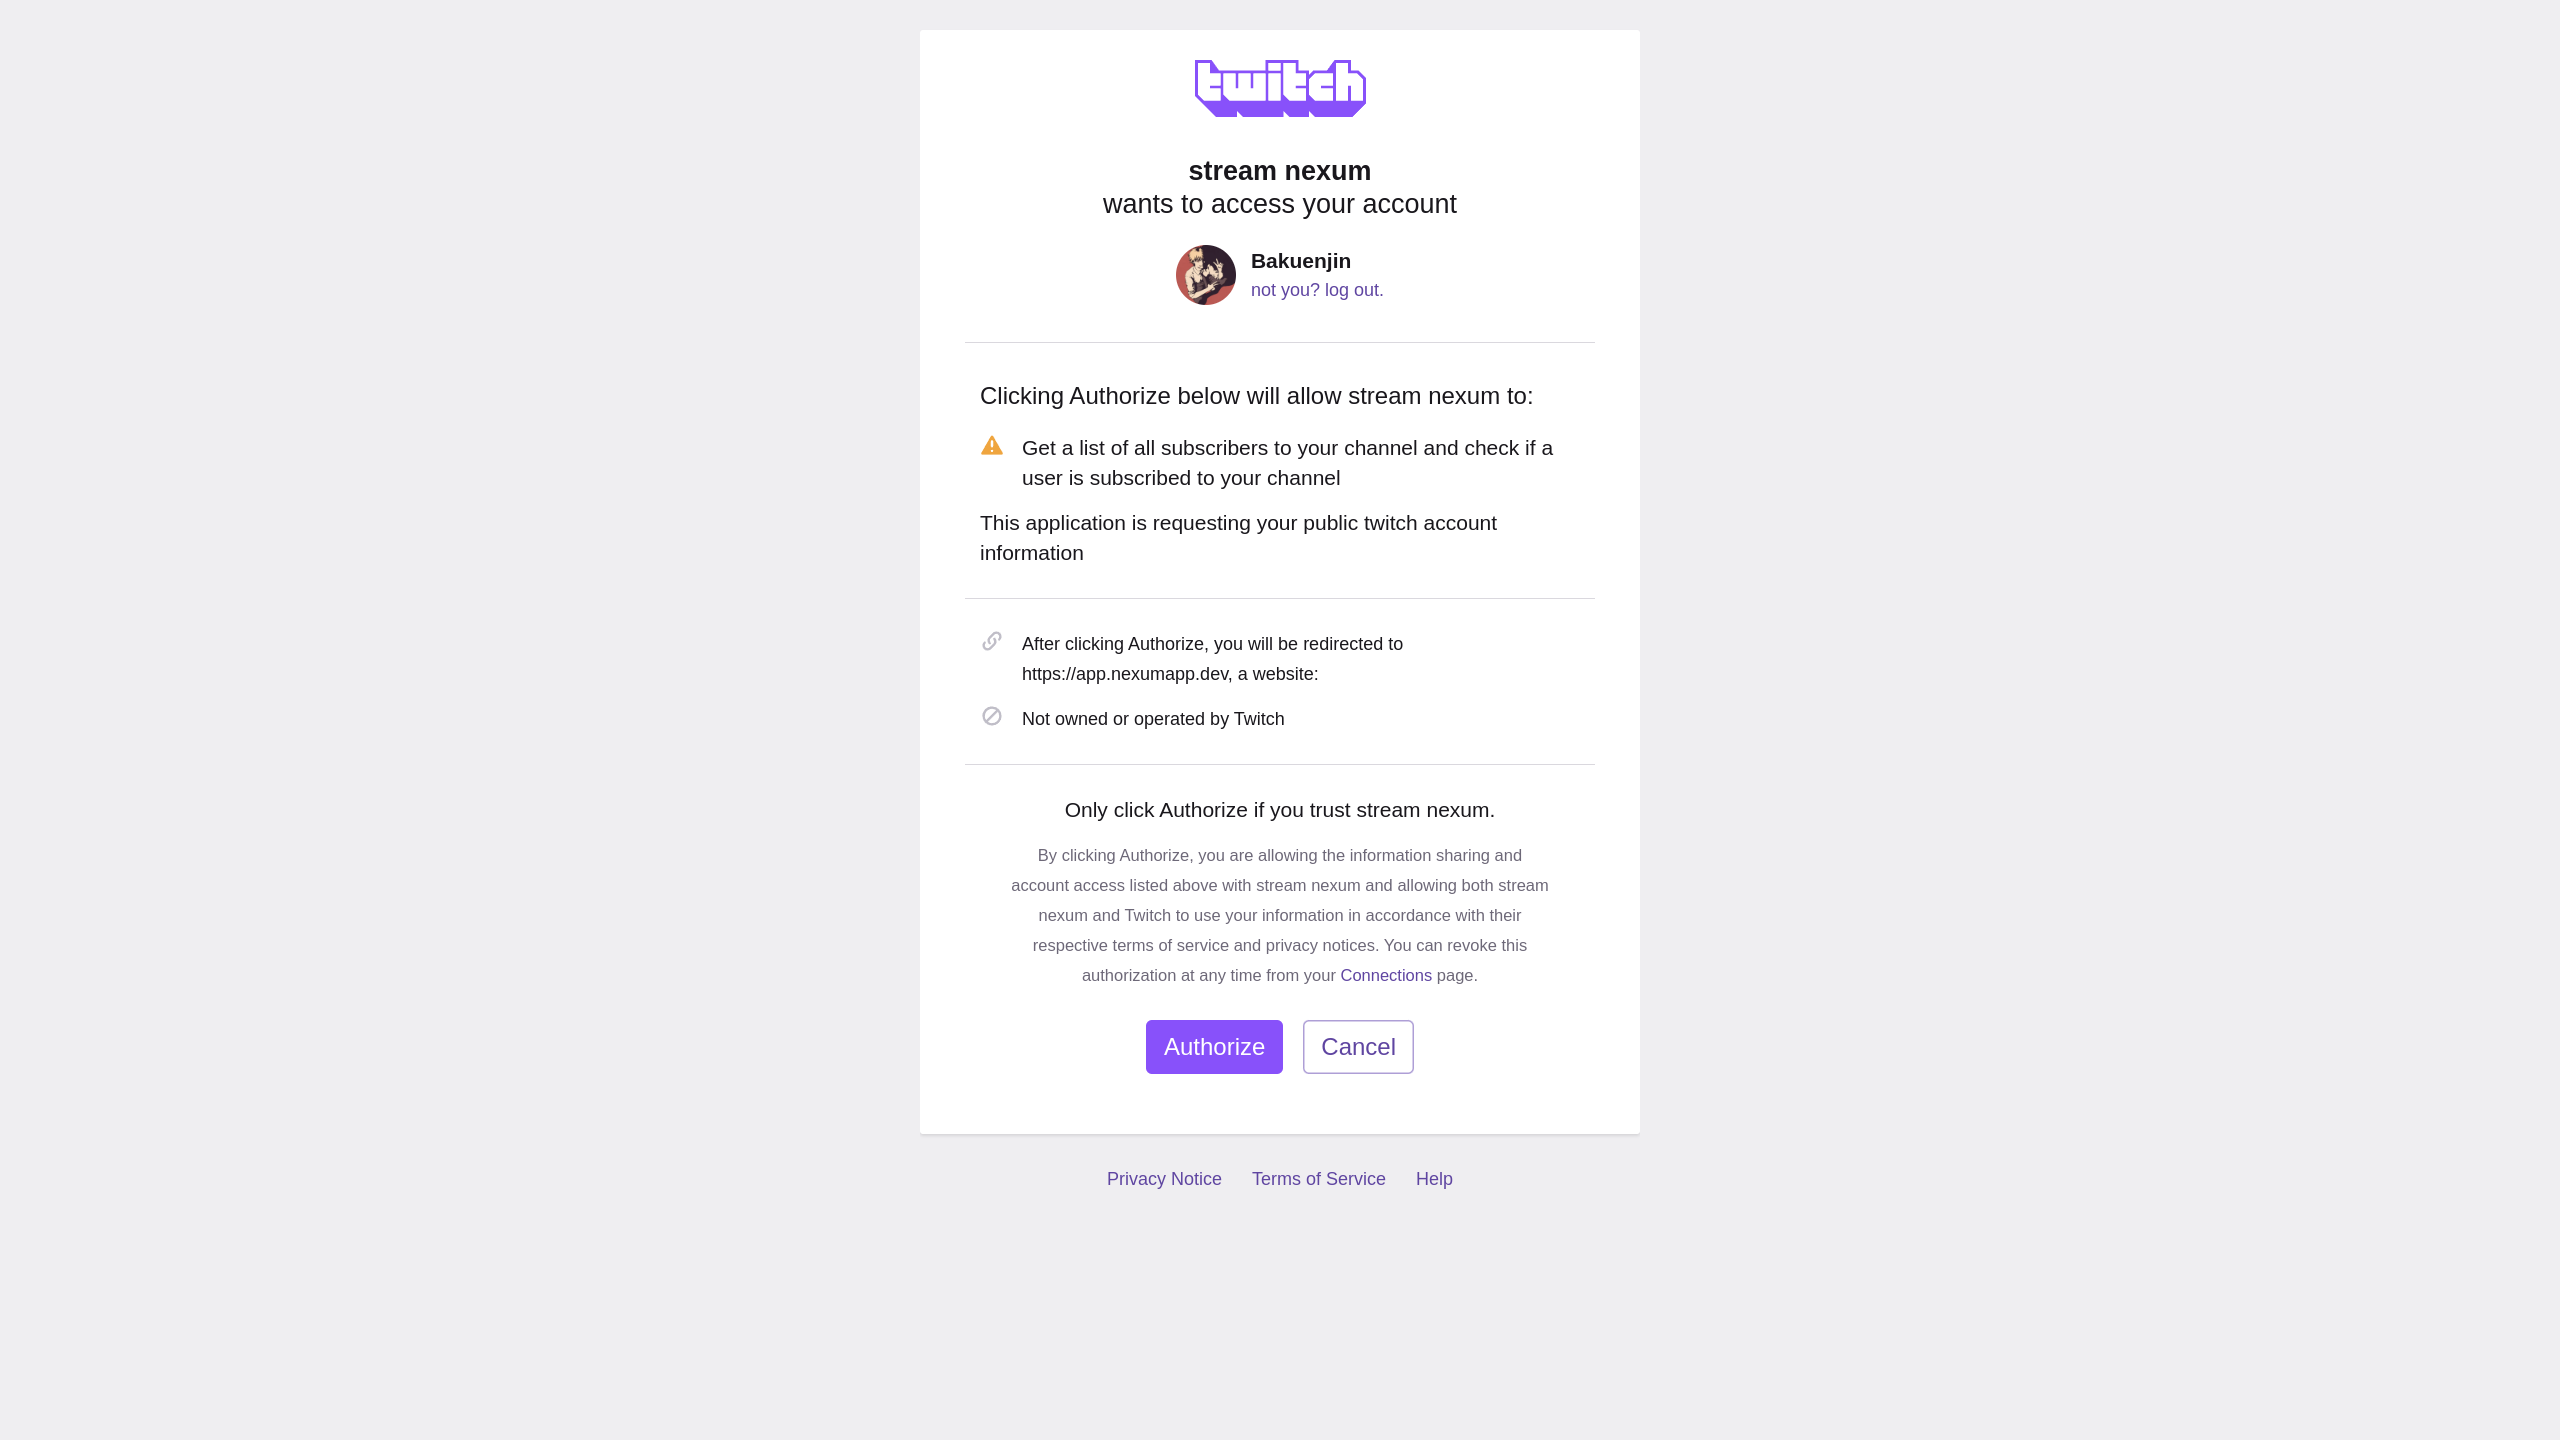
If you have a twitch account, click on the Twitch bubble at the top of the "stream nexum" tile to connect your Twitch account to stream nexum. You will be redirected to Twitch to authorise stream nexum to access your account. After successful authorisation you will be redirected back to stream nexum.
Discord Server Configuration
Now that we have connected both your Discord and Twitch accounts, we can add notifications and shoutouts to your Discord servers.
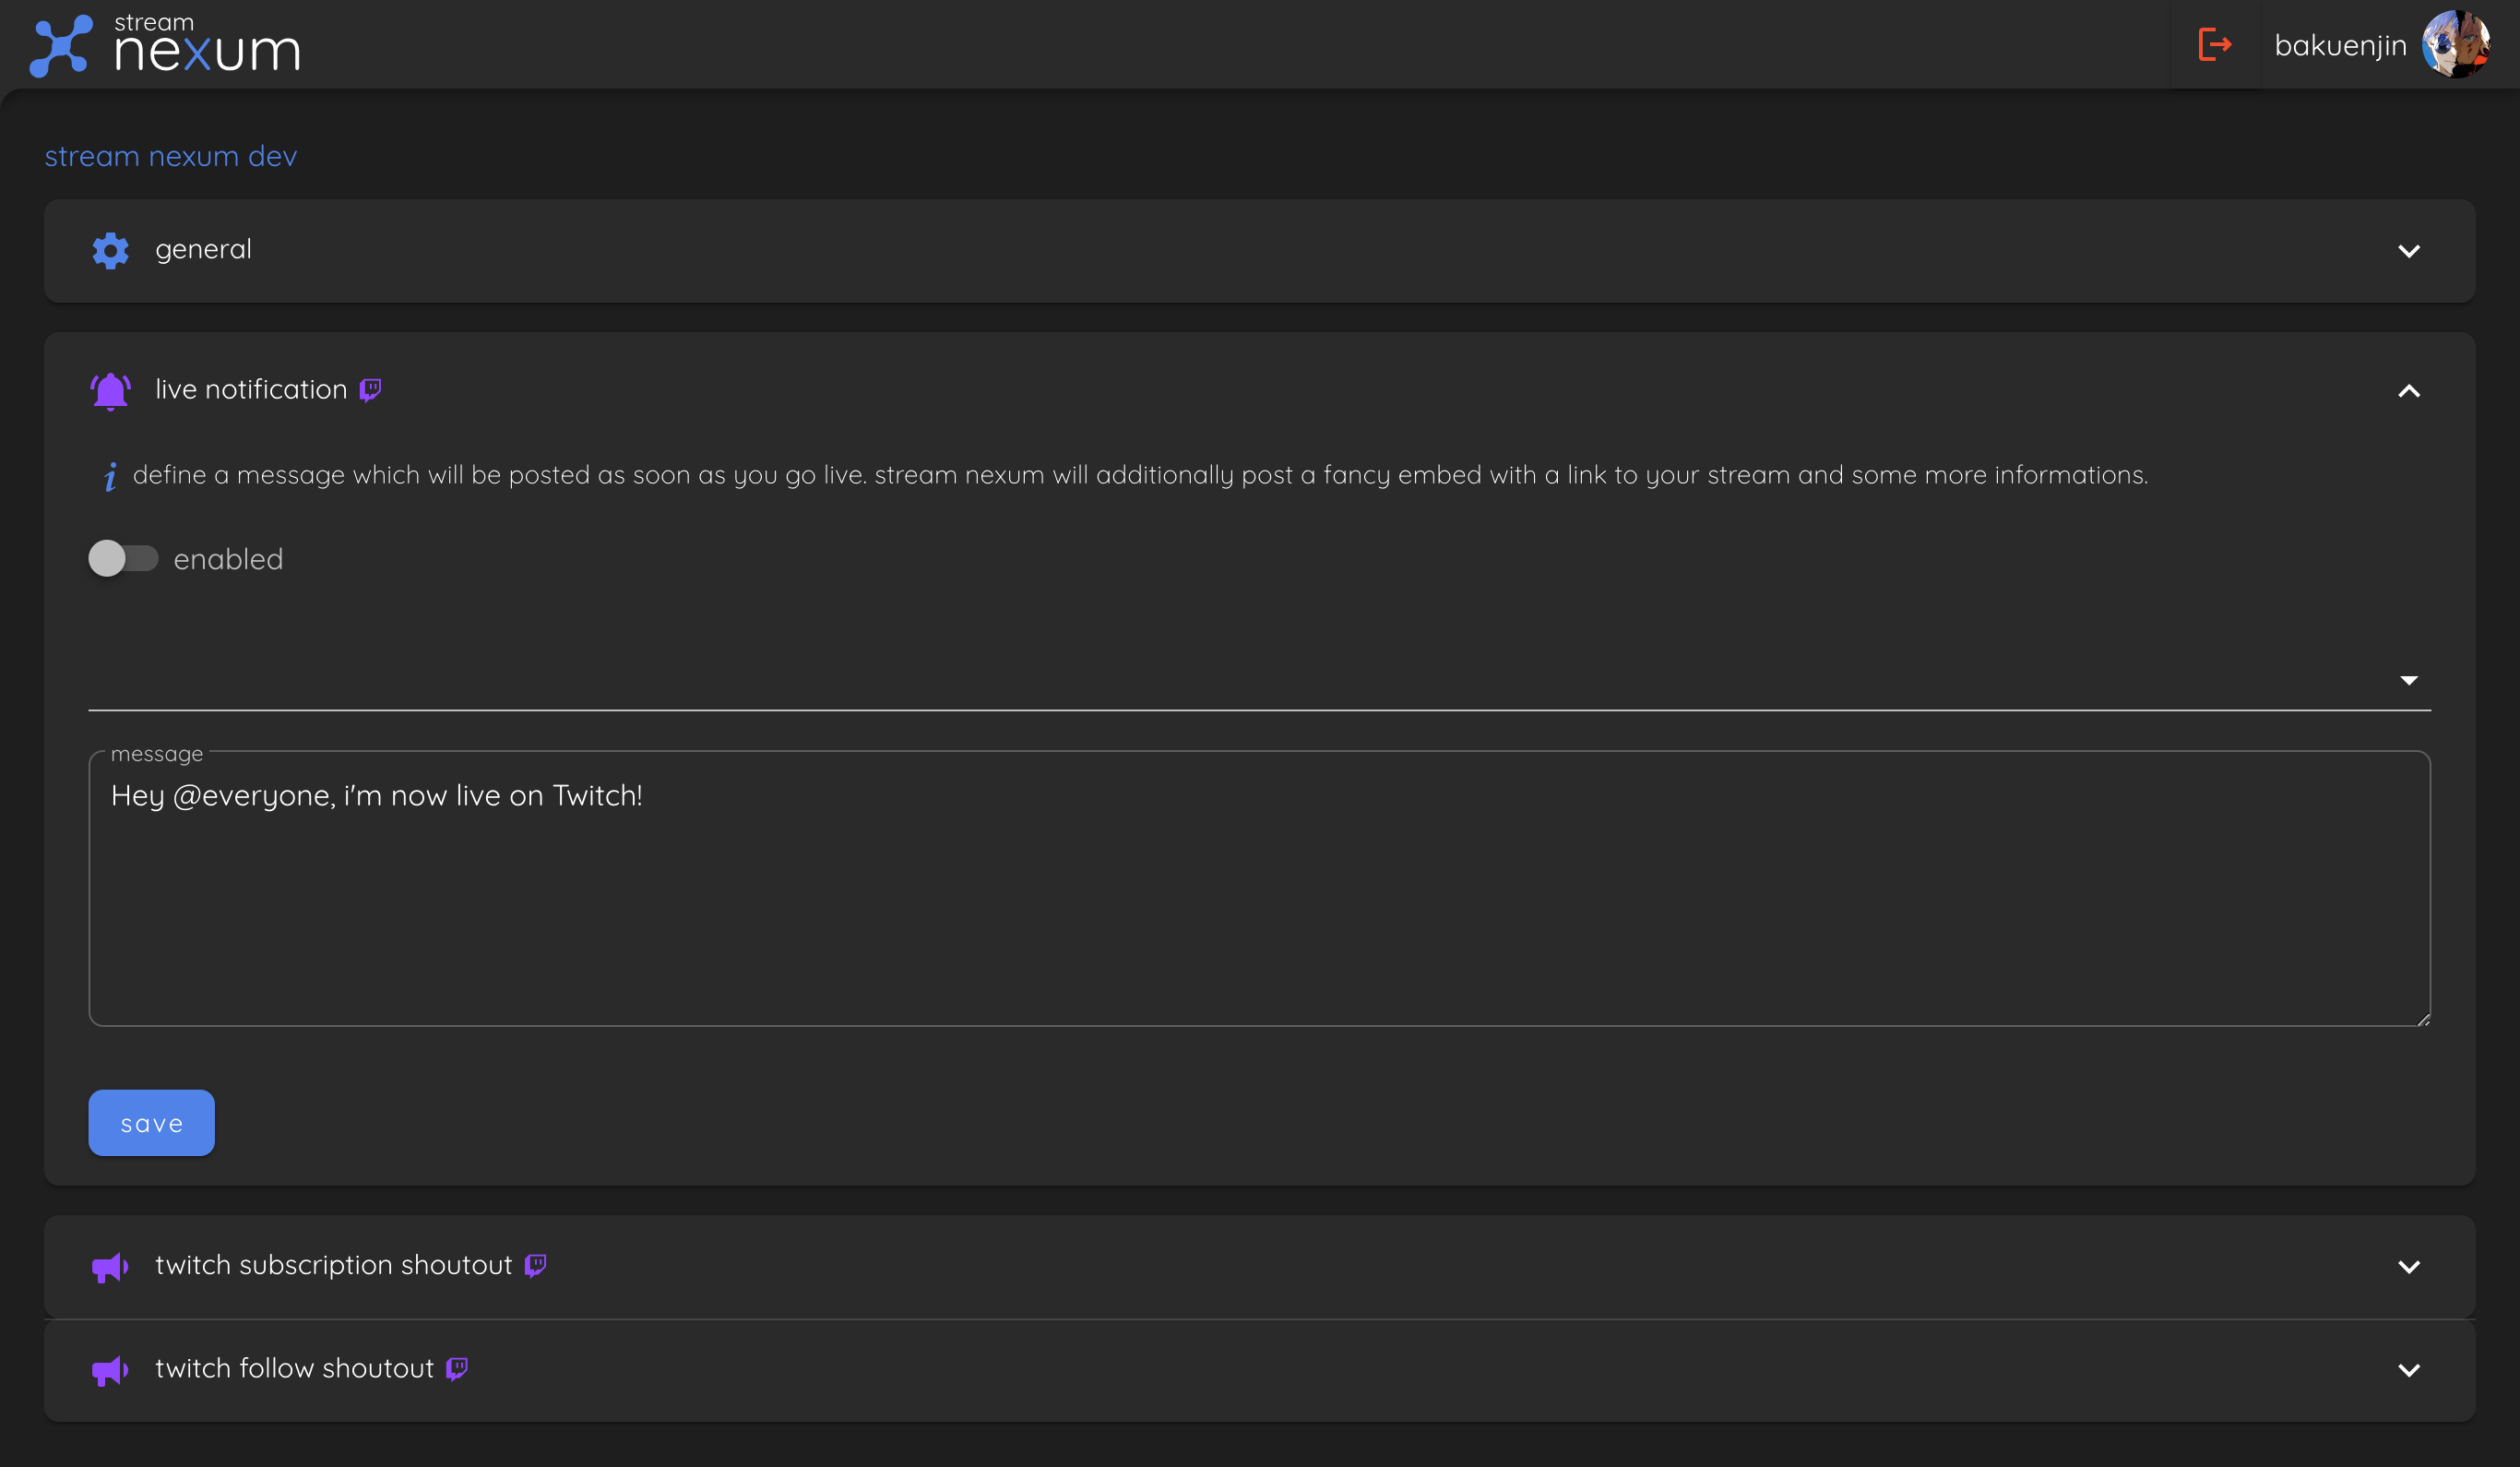
To do this, go to the "my servers" tile and click on the icon of the Discord server you added to your stream nexum account. This will take you to the discord server configuration page.
Here you can configure the live notification that is posted to the specified Discord channel, which can contain a custom message of your choice. The same goes for the subscriber and follower shoutout, which rewards new subscribers and followers with a shoutout in the specified discord channel.
Scene Configuration
Scenes allow you to create overlays that can be added to OBS as a browser source. You can create, delete and edit your scenes in the "scene list" tile on your dashboard.
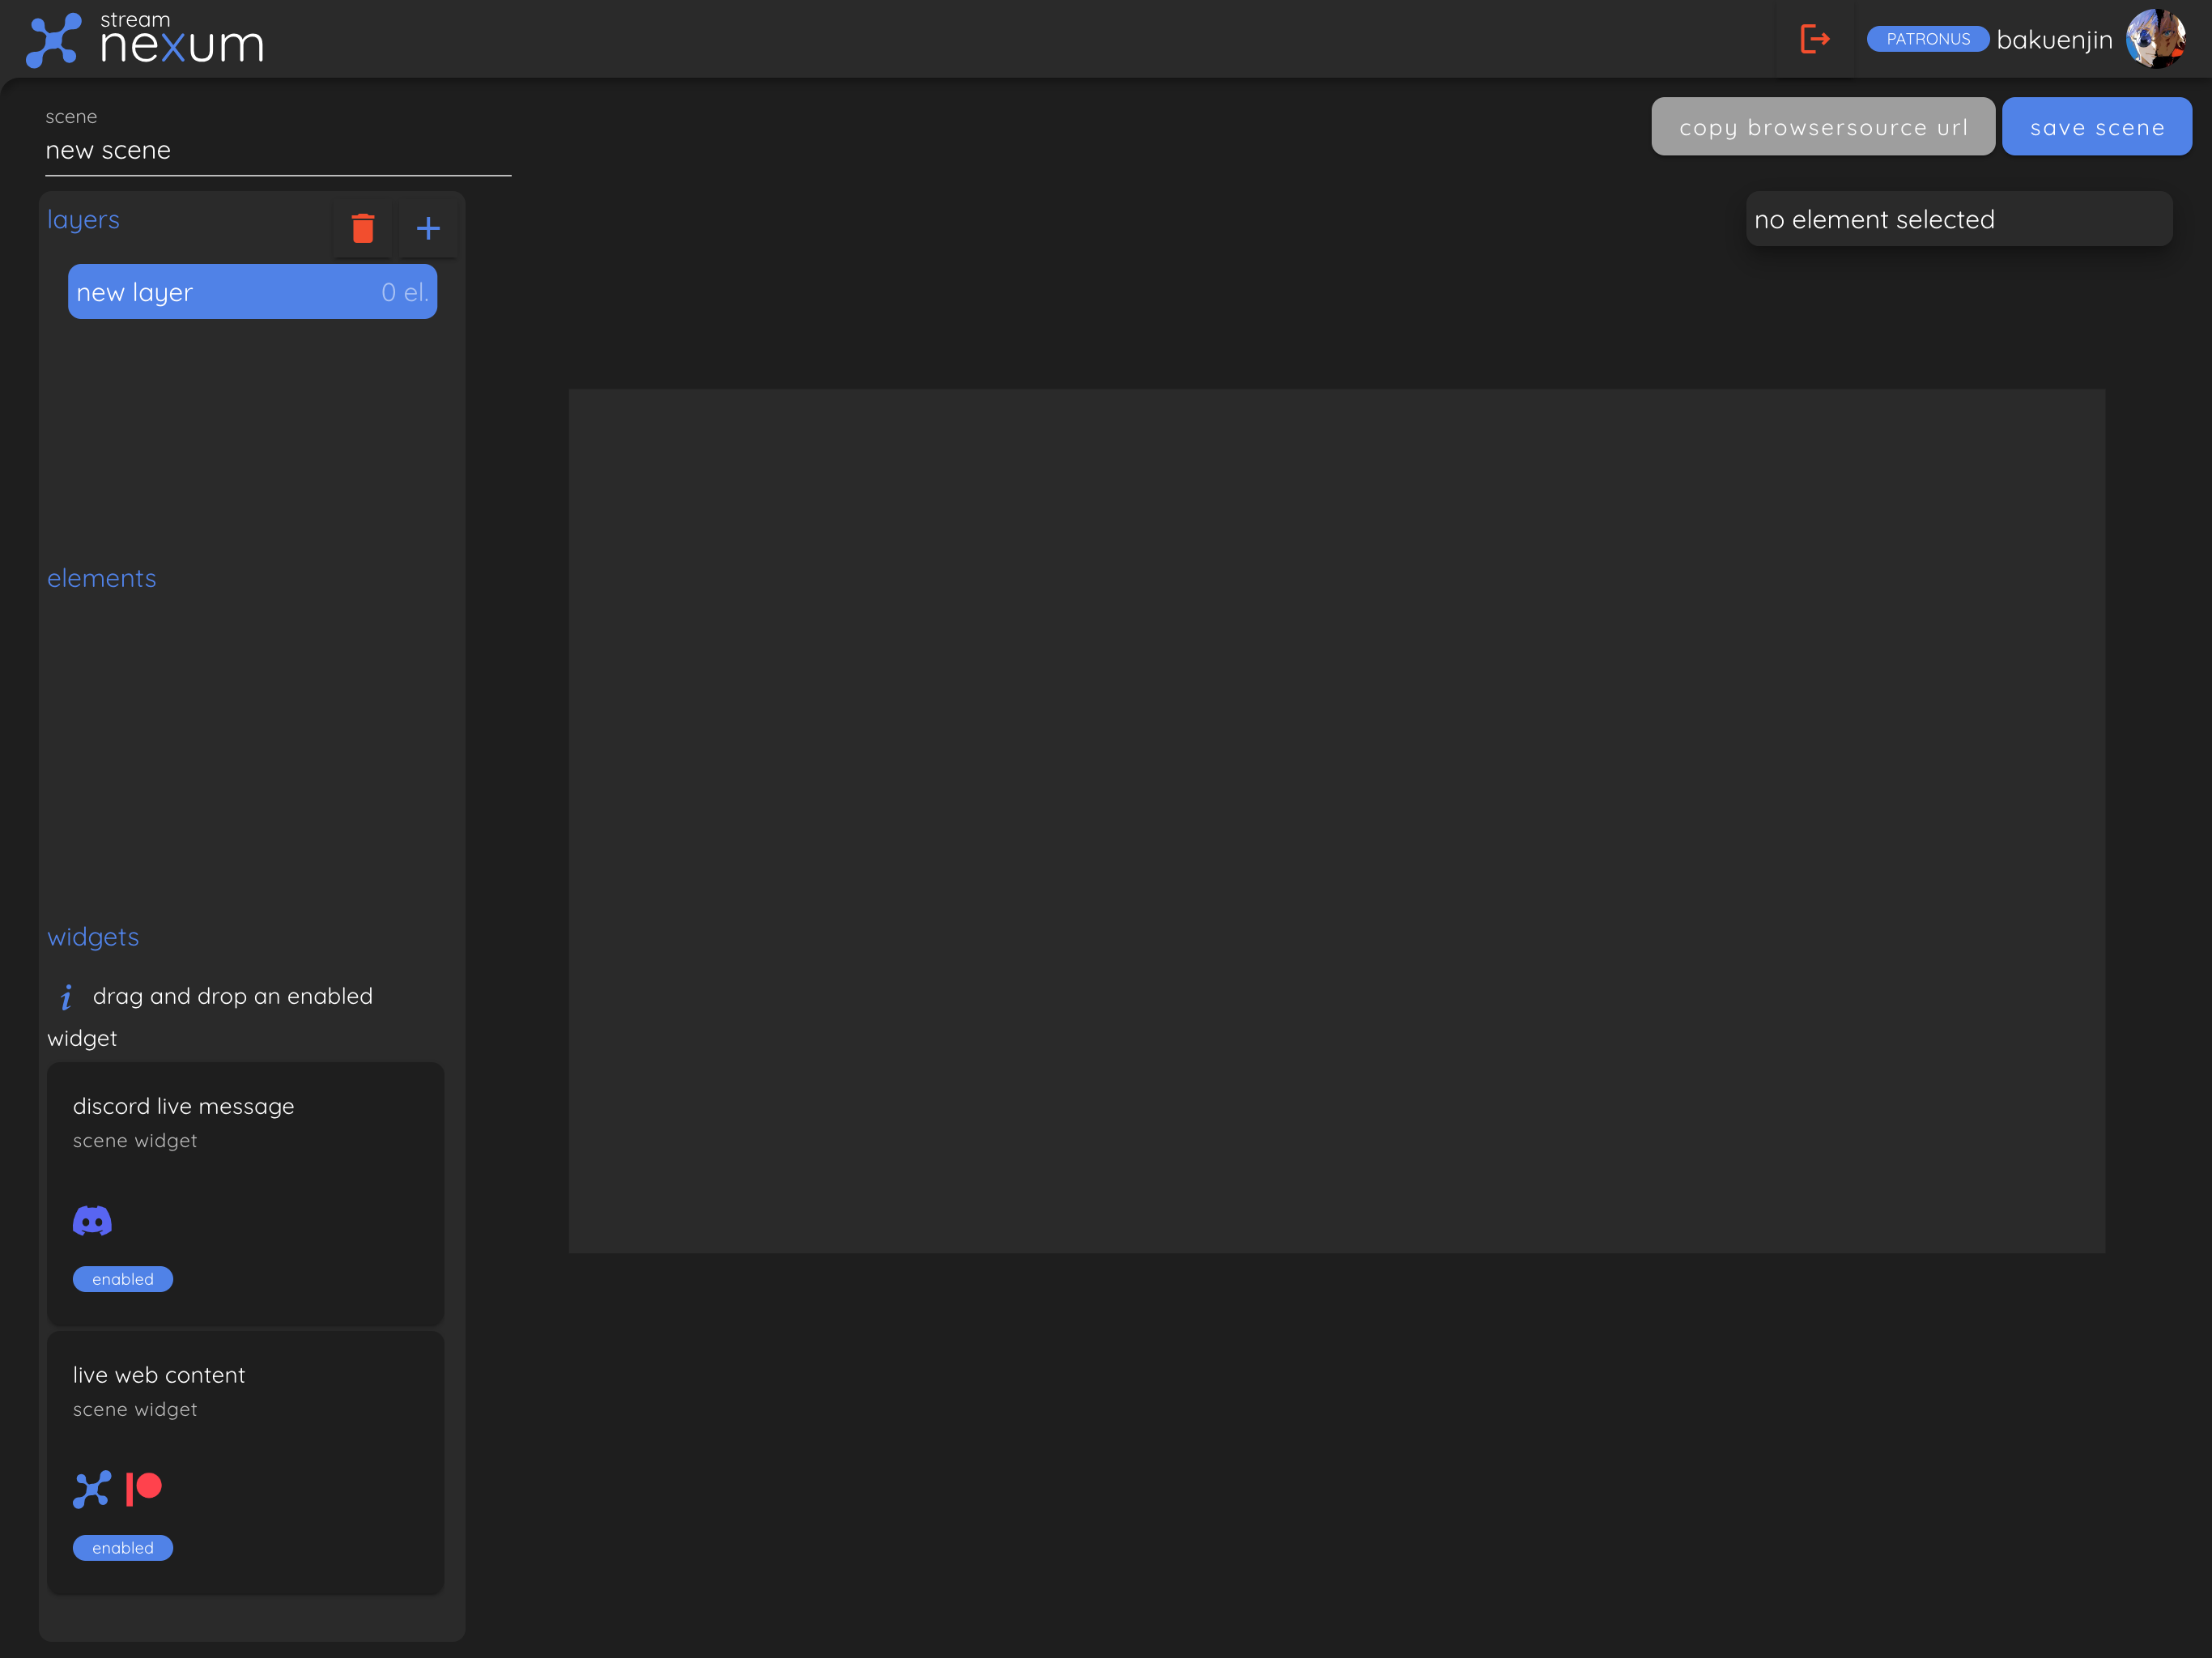
Click on the big blue "+" button to create a new scene, then click on the scene to enter the scene editor.
This may look a little overwhelming at first, but don't worry, we'll walk you through adding our currently supported widgets
Firstly, you can rename your scene in the top left hand corner. We recommend that you give your scenes clear, descriptive names so that you can easily identify them later. For this example, we will name our scene "Widget Examples".
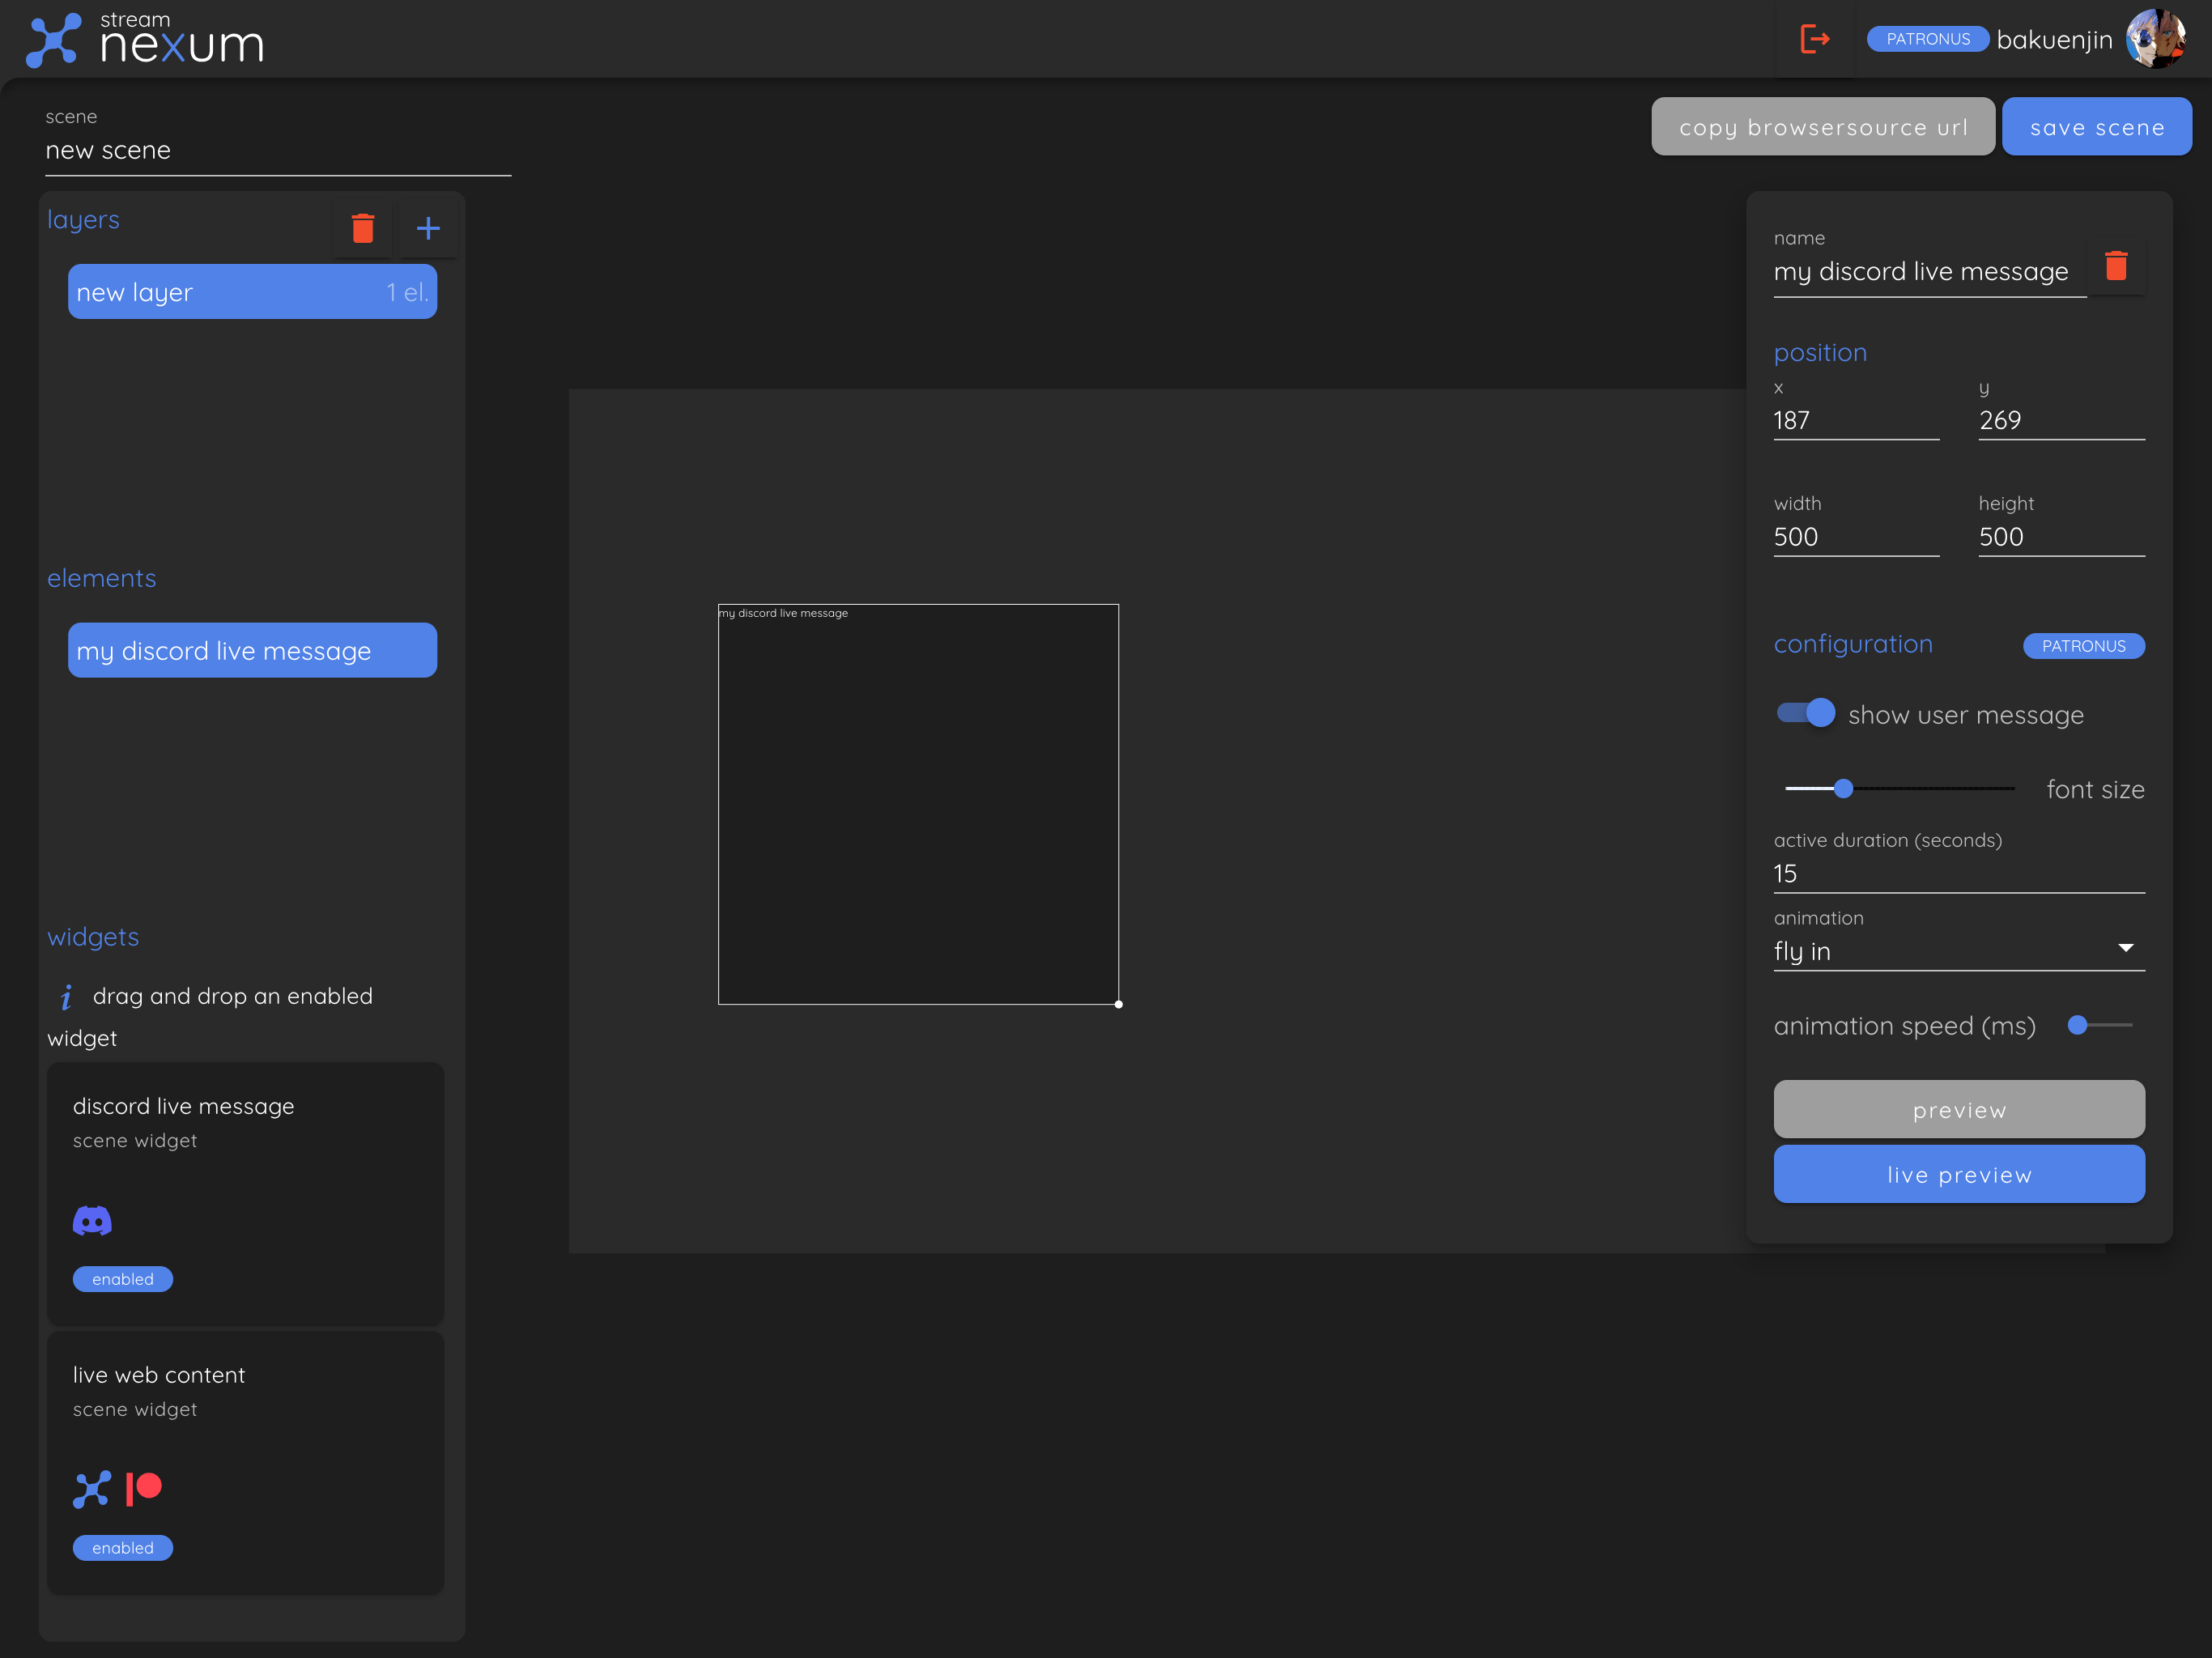
Now let's add some widgets to our scene. On the bottom left you can see the "discord live message" widget. Drag and drop it onto your scene. This will create a new element for the "discord live message" widget in your scene. An element represents a configured widget and will be reusable in future updates of stream nexum.
Now you can configure the element to your liking and also add the "live web content" widget. You can change the position and size of the element by dragging it around the scene or by using the configuration window on the right.
The configuration window also offers two different previews of the element. The preview button will show you a preview in the scene editor, while the live preview will send the preview to the overlay itself. This allows you to check how the element will look in your OBS scenes. However, for the live preview to work, you need to save the scene and add it as a browser source to your OBS, so let's do that now.
Click on the "save scene" button in the top right hand corner and then copy the URL for the scene by clicking on the "copy browsersource url" button next to it.
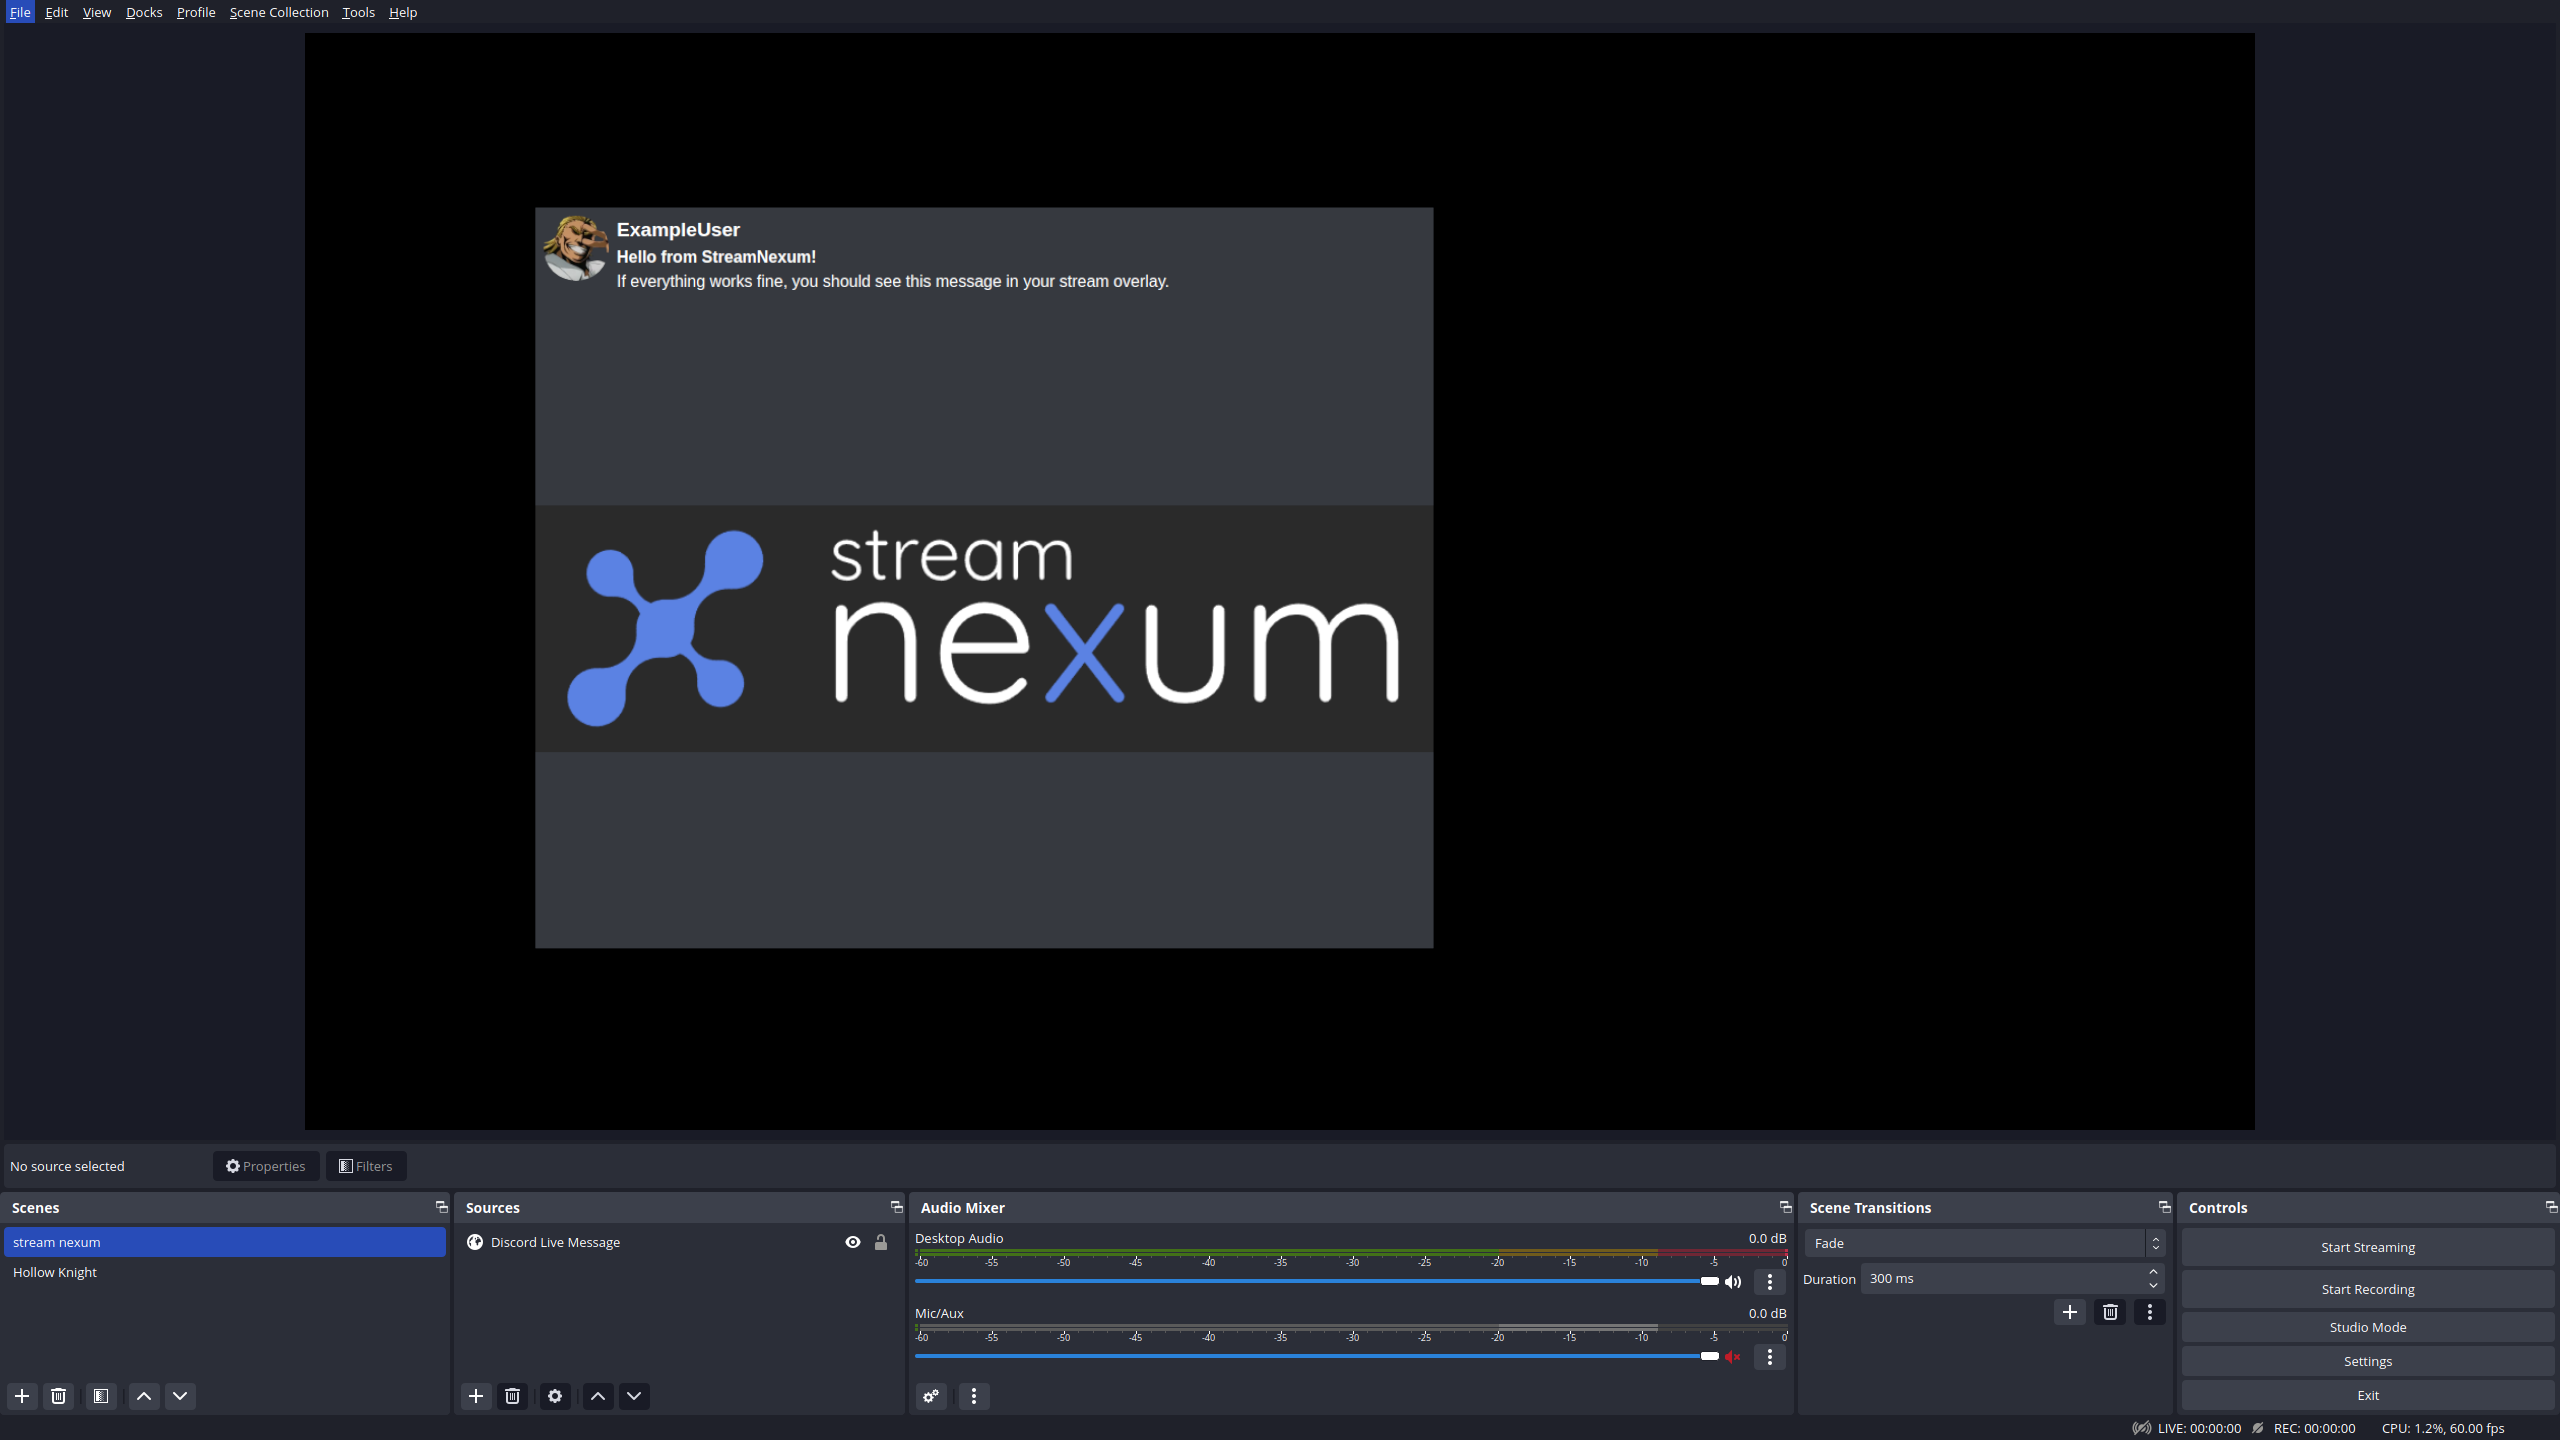
Now go to your OBS and add the URL to your scene as a browser source. You can now use the Live Preview button in the Scene Editor to see how the element will look in your OBS scenes.
Conclusion
If you have followed the quick start guide to this point, you have successfully set up your stream nexum account. You can now add more Discord servers, use multiple scenes or customise the Discord messages for live notifications or shoutouts to followers/subscribers.
See the other documentation pages for more details.


